Pages

Friday, December 31, 2010

Stockton Springs - An Ideal Year End Paddle

Just one boat left in the harbor
Basics: Plowed parking and access to ramp. No winter facilities. Low 1:38PN. Our paddle noon-1:30PM

Forget Christmas; all week long we’ve been anxiously anticipating the return of warm weather. Sure we went to Bangor woods and did some short skis, but they seemed to aggravate my back. What I wanted was to get back on the water.
At last Friday arrived and it was all we were promised; warmth, sunshine, low winds!  We left our ice bound river and headed to Stockton Springs, launching from the beach to the distant chatter of eiders.  We followed along the shore into the sun.
At the end of Cape Jellison is Defence Island, where a lone eagle guarded a nest.
From the island it was just a short distance to Buoy 4.
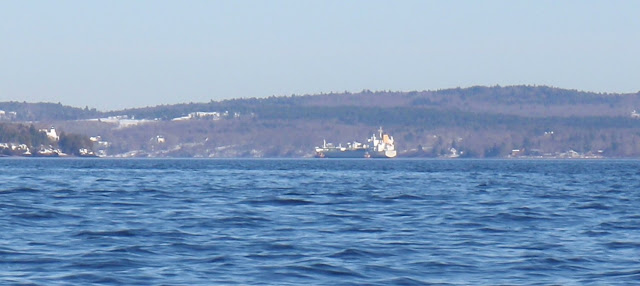
In the distance a large tanker and its tugs is making its way by Fort Point and into the mouth of the Penobscot River.
On Buoy 4 was a sticker. I guess our old friend Marcus Hanna  has been tending to it.
We glided back on an incoming current, enjoying the visual feast of low tide in Maine; periwinkles, mussels, urchins, and long stretches of sand dollars.  Here a periwinkle wends among the sand dollars.
As we were pulling out, lots of beach walkers were arriving. A truck pulled down the ramp, depositing this wonderful 65 pound rowing dory. We changed out of drysuits and into a more typical outer layer, and Mark chatted with the builder, who’s built several boats including a few kayaks.
What a beautiful boat!
Just a short paddle, and a bit embarrassing how stiff my legs were at the conclusion. But it was wonderful, like finding a lost present as you put away the tree. I love viewing low tides, my favorite paddle of the year was Lubec to Eastport, because it was new (to us), and because it was at low tide, in an area renowned for extreme tides.
Tomorrow starts a whole new year!  Best wishes to all!


Sunday, December 26, 2010

Sharing and preserving your memories

It was on a stormy evening much like this when I first fell into my photobook addiction. I was looking through the photos for the year, picking out pictures to print for scrapbooks when I came across a beautiful photo from Stockton Springs Harbor. It struck me that this picture could be an oil painting.
The lighting is amazing, though ideally there would be no tarp
We’d bought a waterproof camera that year, and brought it with us on many paddles. Soon I came across another great photo:
And several more. They weren’t really family photos, they didn’t belong in a family scrapbook, but they were rich in memories. Earlier that summer, Mark’s uncle had first shown us photobooks. Each year he’d make a book summarizing his hiking tours in England. I began thinking we should have a book of just beautiful kayaking pictures. So I gathered the pictures, went to the Winkflash site, made a book and watched the mail anxiously until it arrived.

It was wonderful, and I loved looking through it each night. A week or so later I visited another site, Snapfish and made a second book, this time of a series of boats on beaches, a common motif.
Two boats on Rum Key, off Bar Harbor
Then, seeing how much neater these books were than the scrapbooks, it was off to a third site, Shutterfly, for a collection of favorite family photos. And back to Winkflash, who was having a sale on books: $19.95 for up to 100 pages, for a bigger collection of beautiful kayak pictures and a vacation book. And some cards; glossy 5x7 inch notecards.

A few more books got me through the summer, and by Fall I was ready to inflict share my favorite pictures on with others. So it was time to pick a calendar. I actually wound up with two; one from Winkflash, and one from Shutterfly.
Shutterfly to the left, Winkflash to the right
I started with Winkflash, who tends to be cheaper. But at the time, they had limited designs, no date labels (like New Years Day) and no way to put coordinating photos on the date. (That is now an option) I checked with Snapfish but found the price for what I wanted was too high. Then I got an email from Shutterfly, who’d I’d forgotten as an option. They had a great calendar design, unifying the top and bottom, and some temporary discount which made the calendars quite reasonably priced. Shutterfly is the only site I’ve seen with calendars decorated on both pages.

And last week I realized I’d need more note cards for thank-you notes. I picked up some beautiful glossy cards at Winkflash, just .80 cents each, and a few with an interior and exterior shot (which I can’t seem to do on Winkflash) from Shutterfly, for more, but with free shipping. I ordered the Winkflash cards on Dec 22, and they were shipped on the 23rd. I placed the Shutterfly order on the evening of the 22nd and they arrived on the 24th. (To be fair, Winkflash’s order was larger with several cards, Shutterfly was 5 copies of one card.)

If you are thinking of doing this I have some tips:

1) Check out a few sites. Put together a test collection of pictures to see book/card/calendar formats and prices.

2) To check out the sites they’ll probably make you join and sign. When you do request email/Facebook notices of sales and specials.

3) Gather photos for a specific project in a folder on your computer. That makes it easy to move them to any site to take advantage of a sale, or a special format.

4) If the calendar idea seems appealing, remember you’ll probably be putting it together in October or November. You might want to get Christmas photos now.

5) Some sites allow multiple coupon codes to be entered.

6) Edit carefully, especially gift items. Multiple pictures on a page are trickier than single shots (or well spaced pictures) because depending on the focal point some photos are brighter or darker than others Before you place a big order, you wish to order one copy for final review.

7) Full page pictures in photobooks are ideal for most scenes. It’s a big world, four shots to a page just looks cramped.

Feel free to add your tips or favorite sites (list why!) in the comments area.

Wednesday, December 22, 2010

Ginger Season

Ahh ginger! In the summer we often carry crystallized ginger with us on our adventures. It’s perfect for an unsettled stomach or a quick energy boost before heading home. But now that we’re gathered in the house entertaining visitors, we’ve added many ginger items to our pantry.

There’s fresh ginger, which can be chopped fine and added to soups. Even easier to use is minced ginger straight from the jar. Add a few tablespoons to chicken soup to spice it up, or a tablespoon to cooked rice along with a can of crushed pineapple for a tasty side dish to ham.

In the fridge are several types of ginger beer. Cans of Gosling ginger beer are mild with just a slight bite. Reed’s is available in varying strengths, and has the added tang of natural lemon/lime flavor. Maine Root is bottled in Portland Maine and has a crisp ginger smell with a cloudy appearance and taste announcing its high ginger presence. Stewart’s is strong enough to burn and is best served over ice. It is for true ginger fans only, and we mourned when its production was interrupted in 2009.

And on the table more ginger treats: gingerbread, from a recipe in the Betty Crocker cookbook, with the addition of raisins and ginger orange creams, an experimental recipe.

At present the recipe is as follows:

1 cup semi sweet chocolate chips
1 Tablespoon softened butter
2 Tablespoons minced ginger
¼ cup ground orange peel (they sell this in our natural food store)
½ teaspoon orange extract
2 cups confectioner’s sugar

Melt the chips and coat chocolate molds. (I do this by pouring a little chocolate in and using a paint brush to coat the mold. Mix butter, ginger, orange peel and extract. Gradually add the confectioner’s sugar, until the mix is a good texture for filling. Fill the chocolate lined molds, reheat the melted chocolates and coat the bottoms. Refrigerate and serve. Ideal for your ginger loving friends!
Gratuitous Wintery Scene

Thursday, December 16, 2010

A Window of Opportunity – Sears Island Maine

Yes, it really was this gray and dark midday.  Far in the distance the slot between Isleboro and mainland appears
Basics: Launch 1PM finish 2:30PM Low 12:30. 5.5 miles. Launch from the causeway. Lots of parking, portapottie. No ramp. Steep climb or long twisting portage required.
Launch, either down beside the fence, or through the barriers to the distant info sign (by road) and along trail.
Monday, Bangor set a new high, 57 degrees. The couple inches of rain that fell kept most people from enjoying the warmth though. But on Tuesday, though it was cooler, it was still about 40 degrees, and we planned to take advantage of it. The snowmelt and rain meant that the path to the Penobscot was a slippery clay mess, and the river was a fast moving amalgamation of muddy water and deadwood.

However, the marine forecast was not ideal; winds 10-15 knots with gusts to 20 from the south west and seas of 5 to 6 feet. Under more benign temperatures, we’ve paddled under those conditions, but we had no intent of taking on that challenge in December. So we made our plans accordingly. Our thought: Sears Island. Sears Island is one of the largest unoccupied island on the main coast. (Though since it is connected by a causeway, whether it is technically still an island is subject to debate.) Maine has looked to use Sears Island as a marine terminal for decades. For just as long, others have protested against it. Currently plans call for a marine terminal to be put in, and part of the island preserved as open space. But for now, it’s like a great undeveloped lot, 940 acres beloved by bird watchers and dog walkers.

Most people walk along the one road which leads to a stone pier. If you time the tides correctly, you can walk all the way around Sears Island. The south side is rough cobble beach and near high, you may need either to wade, or to bushwhack a bit.
These ledges on the east side are one spot where you'd get wet at high tide
Since Sears Island has beach all the way around it, there are frequent bail points. We used to think of it as an ideal location for (strong) beginning sea kayakers. We were corrected on that impression by a pair of friends who noted that they’d seen horrible wild water and breaking waves on the south west side. A look at the chart shows how that could happen.
East Arrow marks sand dollar beach (search at low tide in the summer) West arrow is jetty (hopefully)
To the south west shallow water (blue) extends out a half mile or more. Along that same side, there is a stretch which is not protected by Isleboro (that slot is pictured in the first photo.) So, especially in the summer, when winds tend to come from the south, paddlers could easily be surprised by wild chop in that area. And, sure enough, a few trips later we found ourselves in confused water along that shore, whose many rocks certainly adds stress to the experience.

Our plan was to use the island as a wind break, paddling along the east side to sand dollar beach and back. And we also made plans in case the “calm” side was too active, we brought jeans and hiking shoes, so we could substitute a hike for the paddle.
Fortunately, when we got there, it was very calm, as we’d hoped. The wind was below 10 knots. We donned drysuits and PFDs, outfitted our boats with rescue gear and toted them down the hill. It’s slightly easier to carry kayaks down the east side, there is a narrow trail, the cars park beyond the guard rail, and there’s a chain link fence to clutch as you climb down.

Being on the water was incredible, even if the sky, water and beach were a uniform gray. Once we made it to sand dollar beach, we felt comfortable going further, to the rocky strewn south shore.
Almost exactly half way 'round
Though the wind was from the southwest, the angle was such that the seas were small, 1 to 2 feet. All along the west shore patches of seaweed extend out, and as the light was improving and colors other than gray appearing, a few times I ducked into the seaweed to take advantage of how it damped out waves.
Jetty where the road leads.  Behind it hints of a meadow and hardwood forest
We saw a number of birds, a variety of gulls, eiders, pintails and mergansers. Across from the jetty is the active marine terminal of Mack Point.
I can't wait until boats this size are on Sear's Island! -)
Soon we were back at the causeway, ready for our final challenge, carting boats up and over the guardrail.
Mark approaches the causeway. 
One more boat to carry up, one more memory of a wonderful paddle!

Friday, December 10, 2010

Testing My Drysuit

The picture above is from last Sunday, a delightful still day with a temperature of about 33F. We launched at high tide, and stayed quite warm, enjoying the illusion of the reflected snowflakes falling up in the river. This photo is near the finish, I'd just gathered some trash.  You can quite easily spot how far the water has fallen.  What a pretty day that was!


After the paddle I decided it was well past time to test the drysuit, so I waded in.
It was easy to bob along, held up by the lifejacket and air trapped in the suit.  My hands are up attempting to keep the inside of my gloves dry. It was bearable, and I had no trouble swimming, but it was not warm. Optimistically, I’d worn water shoes in, so that my waterproof boots would be dry for paddles later in the week (hah!) My feet got quite cold quite quickly. But the good news is, when I got out, I warmed right up, except the cramped feet. So if I rolled or needed a T-Rescue I’d be all set. However, I would be in trouble if I was in the water too long, reinforcing our conservative winter paddling routine.

It was a useful exercise, and it makes me love my boots all the more. Next step, trying some actually rescues (In a pool or warmer water.)
Not right away, this is how the water looked on Thursday.
And forget trying to paddle between the ice. See how straight the tine red buoy was there? This is the angle it got to when the ice passed near it.
A blurry still from a film we're attempting to edit
The video below shows ice piling up on the shore, ice is a hazard at any squeeze point.

Despite the ice, I'm still optimistic.  It's supposed to warm up this weekend, one good tide cycle and all that ice could be melted or off in the ocean!

Sunday, December 5, 2010

A Tale of Two Trap Trees

We have been inundated with trap tree news this fall. A trap tree is a Christmas tree made by piling up lobster traps (some places call them lobsterpots.) Rockland, which has built a trap tree since 2003, held two lighting ceremonies this year. One in Mid November, filmed for a 2011 Discovery special on interesting Christmas trees, the second a week later. Meanwhile, on Beals Island, the community was working to build the world’s largest trap tree.
Being easily swayed by media, I began to feel I should actually see a trap tree live and in person. But which one: the Beals Island one, which was the biggest; or the Rockport tree, which was the original? I’ve never been to Beals Island, located Downeast of here. I’ve been to Rockland, which is just over an hour southwest on the midcoast. Rockland has a downtown filled with bakeries, restaurants, galleries and gift stores. Beals Island, as I read in Guide to Sea Kayaking in Maine by Shelley Johnson and Vaughan Smith, has Island Variety, a convenience store.
But Beals Island has another feature which is far more appealing to a kayaker: the Great Wass Archipelago, a series of more than 50 islands. It looked like there was an easy loop out through the inside of the islands, around Eastern Bay, stopping at an island with a lighthouse on it. I read Mark some of the descriptions of the islands, many of which are sea bird sanctuaries, thus off limits for much of the spring and summer. When I got home from work the next night there was a chart on the table. “That chart’s a little small” Mark explained, “I’ll redo it in two sections.” Then he added temptingly, “You know ocean water is warmer than the Penobscot now.”
Boy, that chart looked inviting. I could see the route, either from the Jonesport ramp, or from Beals Island. The ledges run all through Eastern Bay, lots of short jumps of less than a half mile. Absolutely perfect for a September jaunt. Tempting even for a late paddle, though without knowing anything about the currents, and with a destination called Mistake Island, it seemed like maybe it was best to wait.

So with reasons to see both, we decided to visit both trap trees, and scout the two locations for launch sites.
Since our first available day coincided with rain, we planned a trip to Rockland. The tree is located by the Fisherman’s Memorial and the Rockland Public Launch, 152 traps make up this tree.
The public launch is just down the hill, and the Rockland breakwater is just visible as a gray line to the left.

It is topped with a lobster holding a star, and decorated with dozens of lobster buoys.
The public launch has a small gravel beach from which kayaks can be launched. There is also a public beach nearby. My favorite feature is this nearby park filled with marine relicts.
See how the bell has been worn away by the striker
Another launch site is available further from the center of town on Snow Street, beside the Coastal Children's Museum and the Snow Marine Museum . It looked pretty empty, but the state of Maine resources guide describes it as the busiest ramp in the area.
But the real joy of this trip was visiting the downtown.
We had a nice lunch, which gave Mark a chance to make sure no work crisis had erupted. Then we went window shopping
Decorations at Seagull Cottage
I'm not sure how many bakeries exist in Rockland, 4, 5 more?
 Our next trip was up to Beals Island. The storm system had stalled overhead, so this day was also gray with a steady mist. It was a long drive there through very rural Washington County, an area where you need to be self sufficient to survive. The tree came into sight as we went over the bridge.
Not only is an island in view, but someone is working on the boat.
This is a much bigger tree, made with 769 traps, and topped with a fisherman in yellow oilcloth.
Either I've shrunken to half size, or this tree is twice as big
And it was plainly made with recently used traps: bricks and barnacles decorated the interiors.
But what was even more evident was how busy the working waterfront is in the area.
There were plenty more traps in case a larger tree was desired.

The water was filled with boats, with more on shore waiting to join in. Traps stored on shore indicated that in the summer access to launch points would be very limited, and the need to be on guard for working boats paramount.
Jonesport Launch
The Jonesport launch was described as having adequate parking, but was nearly full already. The shrimp season had just opened. The Beals launch was fairly empty, but hardly spacious and looked like it was a critical area allowing commercial fisherman access to the water.

Beals Island has a seasonal take out stand but Island Variety has been closed for years. Hikers would be interested in the trails on Great Wass Island, on land managed by the Nature Conservancy. Nearby Jonesport has some scattered stores, and is also the launch point for Norton Puffin tours. I’d hoped to eat at Tall Barney’s in Jonesport, named for a local giant. But though there were cars in the lot, it was closed, as was the nearby diner.

So we began our trip home. As we passed along route 1 in Addison a hand painted sign noted that the Bohemian Mama’s Bakery was open, and had a tiny “WIFI” lettering added. Since Mark needed to check in, we decided to stop. About a mile off route 1 at 251 Ridge Rd we came to the bakery.
No web page, but a facebook site Inside was a case full of scones, puff pastry, bars and other treats, as well as a rack of loaves and rolls. And on the counter were samples of their wood fired brick oven pizza. Delicious! We settled in at a table, and soon were splitting a pepperoni pizza. Their menu lists several amazing deserts, and has been stored away for future use. Sadly, in the winter they are open only two days a week.

So, though the Beals tree was bigger, I have to rate Rockland as the better winter experience. However, hikers looking for wild coast line would probably prefer Beals Island. And, I feel our trip to Beals Island was not wasted, the sheer number of boats there makes that a much different paddling area than I’d expected. I hope to get back there again when the weather is better, maybe after bird nesting season ends and probably on a Sunday, when traditionally lobster boats stay home. I did find that Ray Wirth had done a winter trip to Beal, which you might enjoy reading.
And I also think this proves that if you build something wicked big, people will come and spend money in your area.

Saturday, December 4, 2010

Aaaaaaargh! Winter Buoys Arrive

I suspected once I gave up on the winter buoys arriving they would appear.  I don't have an exact date, but they weren't in the river on Tuesday, and they were on Saturday.
Revised Post - A Change of Buoys

Wednesday, December 1, 2010

Magnetic North Lines – The Path to Happiness

You guys are so lucky! I've convinced Mark, my navigational guru, to post some chart tips for you.

Magnetic North Lines – The Path to Happiness:

As we all know, compass needles point to magnetic north. Charts and maps are aligned with true north. They are not usually the same direction - where I paddle there is about a 16-18 degree difference. Somehow, you have to deal with this problem when trying to connect your chart to your compass. There's the old mnemonic "East is Least and West is Best" to help you convert between Magnetic and True, but when I'm out on the water, the last thing I want to be doing is math in my head; it's just too easy to make a mistake.

Some people recommend that you pre-plan your entire route (and possible route variations) ahead of time, in the comfort of your home, and prepare your chart by jotting down all the course bearings in magnetic with the crossing distances. You can do that...it's a good system...but it's not very flexible and it takes a lot of work.

I've adopted an approach that takes most of the complexity out of using a chart yet still allows a flexible approach to course selection. I prepare my charts and maps by drawing a grid of evenly-spaced parallel lines over them. The lines are oriented to run parallel to magnetic north. I usually use a spacing of half a nautical mile. This chart addition eliminates the need for a compass rose or a scale of miles on the chart section.

Chart section with magnetic north grid-lines added
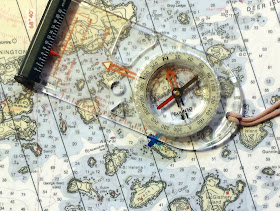
Now, when I need a course bearing, I simply use a baseplate hiking compass (which is tethered to the chart-case) as a protractor to measure the angle between my desired course and the Magnetic North grid-lines.
Compass and chart terms
This is done by aligning the edge of the compass baseplate on the chart with the direction-of-travel arrow pointing towards my destination. In the photo below, I'm getting the bearing from the east end of Wreck Island to the east end of Bare Island.
Align the baseplate edge along your desired course
Then, I rotate the compass ring until the Orienting arrow (hollow red arrow by the needle) aligns with the magnetic north lines of my grid overlay. Ignore what the needle is doing - we're just using the compass as a protractor here. The angle I read off the compass on the Direction of Travel line is the course heading I want to see on my deck compass (assuming I don't have to compensate for any currents).
Turn the ring until the orienting arrow is aligned parallel to the chart lines and pointing towards magnetic north
In this case, the course bearing is around 40 degrees. By the way, if I want the back-bearing for the return trip, it's also on the compass, on the opposite side of the compass ring. On my compass, I've scribed another mark there to make reading it easier.

I estimate distances visually using the grid spacing. I know that our usual speed is about 3 knots, which is 20 minutes to cover a nautical mile. With my usual half-mile grid spacing, each grid line is about 10 minutes of paddling apart. So the crossing from Wreck Island to Bare Island in the example above looks to be about .3 miles or about 6 minutes. It's a rough approach but it's accurate enough for the crossings we usually do.

More navigational tips from Mark:

Another question I'm often faced with is the reverse: What is that island over there? This can be a problem in geographically complex areas like the one below. Imagine that we are on the north end of Bare Island (marked with a blue X). There are about 20 islands within a one mile distance of us! What's the name of that big round one over there?

From Bare Island, the view is pretty confusing!
To figure that out, the simplest way is to take a hand bearing on the island with the hiking compass. Then, place the hiking compass on the chart and turn it so that the orienting arrow aligns with the magnetic north lines and slide the baseplate around until one of the edges runs through your current position. Then, follow the edge line until you find the island on the chart. It's Green Island!

Transferring a hand bearing taken with the hiking compass to the chart
If you want to do the same thing with your deck compass, you will need to read the bearing off the deck compass and dial it into the hiking compass. Then, use the same procedure shown above.

You can use the same technique to locate yourself along a known line of position, such as a shoreline or a range, using a bearing on a known chart object. Take the hiking compass with the bearing on it and align the orienting arrow with the magnetic north lines as usual. Then float the compass around until a baseplate edge passes through the known object. Your position should be at the intersection of the baseplate edge line and your known line of position. You've just done a compass triangulation without any math at all!

The system is not my own invention...I learned it from a Boy Scout manual when I was much younger. I've simply extended it to the marine environment and expanded it a bit. My wife and I find it very easy to use, even when our "chart room" is our spray skirts in a bouncing kayak.

Preparing the charts:

To prepare your charts (or maps) in this way, you have a number of choices. You can use a traditional paper chart and get the lines of magnetic north from the compass rose and use parallel rules and dividers to lay out the grid.
Traditional charting tools can be used to construct the grid
Or, you can prepare a stencil for standard scale charts and draw the grid much faster. Using my router, I've built a plastic stencil for the 1:40,000 scale charts we usually use.
Using a custom stencil to complete the grid
More commonly now, I get my charts in electronic raster format from the NOAA website, or other sources, and use an assortment of image editors and drafting programs to position a grid layer on top of the chart. Then, I print the section and seal it with a laminator. This article from PaddlingLight.com tells you how to get the electronic charts from NOAA. It's not as simple as you might hope as they are in an image format that most image editors don't recognize (BSB) so you have to use a converter of some sort. Bryan from PaddlingLight.com pointed out in the comments that there is another great article on PaddlingLight.com that discusses how to get a free BSB converter. Thanks Bryan!

For the curious, I purchased the PhotoShop BSB converter plug-in and used it with my version of PaintShop 9 (which can use PhotoShop plug-ins) to convert all the charts I was interested in to GIF format. Then, I use MSPaint (the large size of the images seems to confuse PaintShop when copying to the clipboard) to copy the section I want (along with a piece of the miles scale) which I then paste into a layer in WindowsDraw which is a vector drawing program that also handles images. I have a bunch of parallel line grids set up in WindowsDraw. I pick one and resize it until the grid spacing appears to match the miles scale on the chart section. I then rotate the grid the number of degrees the compass rose tells me I need to align with magnetic north. I might also mark up the chart in other ways in WindowsDraw, such as add in landing spots or Lat/Lon information for GPS use. Finally, I print it out, trim it down and laminate it. Then it goes in the chart-case.